If you want to understand how an injection mold works, first you have to learn the ins and outs of the tool. This is a quick guide for those who want the basics to injection molding tools. If you’d like even more information, check out our
complete guide.
An injection mold is one of the custom-machined tools used in plastic injection molding to mold molten plastic into plastic products. Manufacturers design these molds for specific plastic products they will produce.
The most common injection mold is a two-plate tool. There are other
types of injection molds as well. The two-plate tool consists of two main parts, the injection mold (A Plate) and the ejector mold (B Plate). These plates are attached to platens and held together by a clamping unit. When these plates come together to form the injection mold, there is a natural divide or split called the parting line.
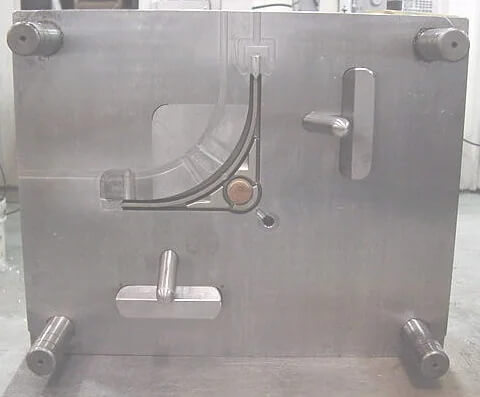
The Injection Mold (A Plate)
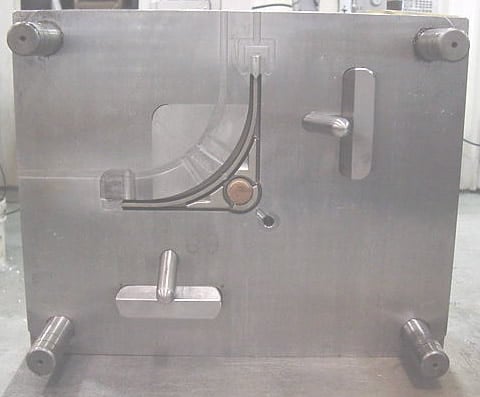
The injection mold (A Plate) is the entry point through which molten plastic is transferred from the injection unit to the injection mold. The opening or entrance of the injection mold (A Plate) is called the sprue bushing. The sprue bushing is attached to the sprue, which is a passageway that leads the molten plastic to the runners. Runners are tunnels or channels that connect the sprue to the gates, or the entrances, of the cavity image. Runners lead the molten plastic to the cavity image.
The Cavity Image
The cavity image is an empty space inside of the injection mold that forms the shape of the desired plastic product. Injection molds can have single or multiple cavities.
An injection mold tool with one cavity image is called a single impression cavity mold. A mold with two or more cavity images will be called multiple impression cavity molds. Some molds can have over one-hundred and twenty-eight cavity images.
The Ejector Mold (B Plate)
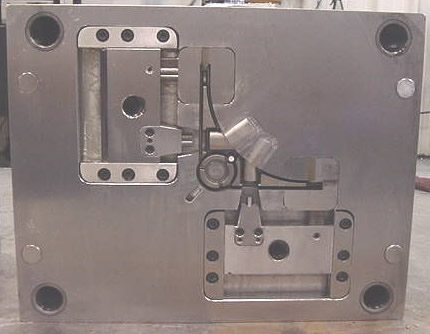
The ejector mold (B Plate) is the exit point through which the plastic product is ejected from the injection mold. Once the plastic product is ready, the clamping unit slides the ejector mold (B Plate) away from the injection mold (A Plate), opening the injection mold. As the mold opens, circular pins called ejector pins push the plastic product off of the injection mold. Of course, injection molds naturally leave marks on the plastic products they produce.
The walls of the ejector mold (B Plate) are tapered so that the plastic product can eject properly. This is called the draft angle. If there is no draft angle, and the walls are ninety degrees, the plastic product will scrape against the walls of the ejector mold (B Plate) and have trouble ejecting. This may cause damage to the mold and to the molded plastic. With a draft angle, the molded plastic is easily ejected because the walls will make no contact and air can rush in to break the vacuum seal.
The Next Step
Now that you know all of the intricate parts of an injection molding tool, the next step is to learn the
tooling process.